Current section
Files
Jump to
Current section
Files
priv/samples/sensors/bmp280.livemd
# Hello BMP280
## Introduction
This sample demonstrates how to read temperature data from the BMP280 temperature sensor board. We will use [I2C](https://en.wikipedia.org/wiki/I%C2%B2C) protocol to connect a sensor board to our Nerves target device (e.g., Raspbery Pi).
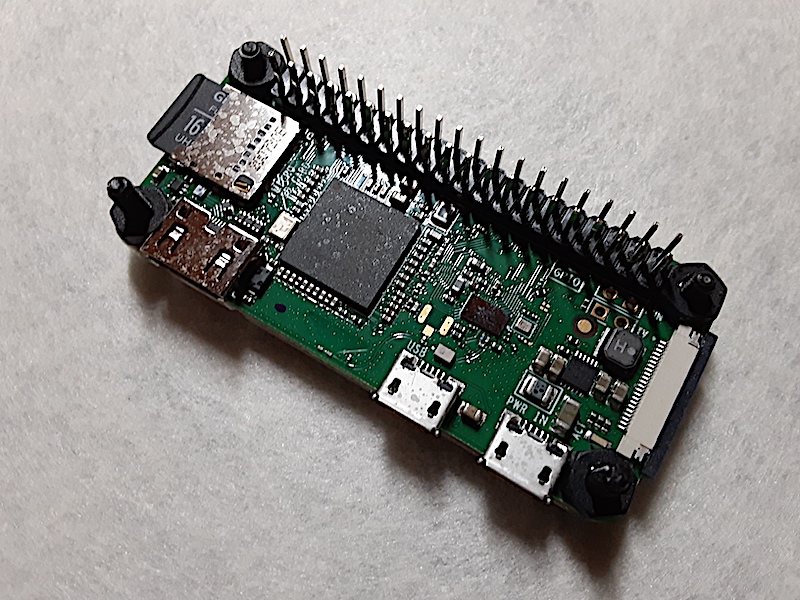
## Nerves target
The explanation below assumes a [Raspberry Pi Zero W](https://www.raspberrypi.org/products/raspberry-pi-zero-w/) as a target device but other [Nerves targets](https://hexdocs.pm/nerves/targets.html) should work as well.
## Sensor board
The [Bosch BMP280 sensor](https://www.bosch-sensortec.com/products/environmental-sensors/pressure-sensors/) itself is so tiny that it might be difficult to handle but some electronics components manufactureres mount it on a [breakout board](https://en.wikipedia.org/wiki/Printed_circuit_board) for our convenience, which is what we look for. Do [Google search by "BMP280 breakout board"](https://www.google.com/search?q=bmp280+breakout+board) and you will find something like [Adafruit BMP280 Sensor board](https://www.adafruit.com/product/2651).
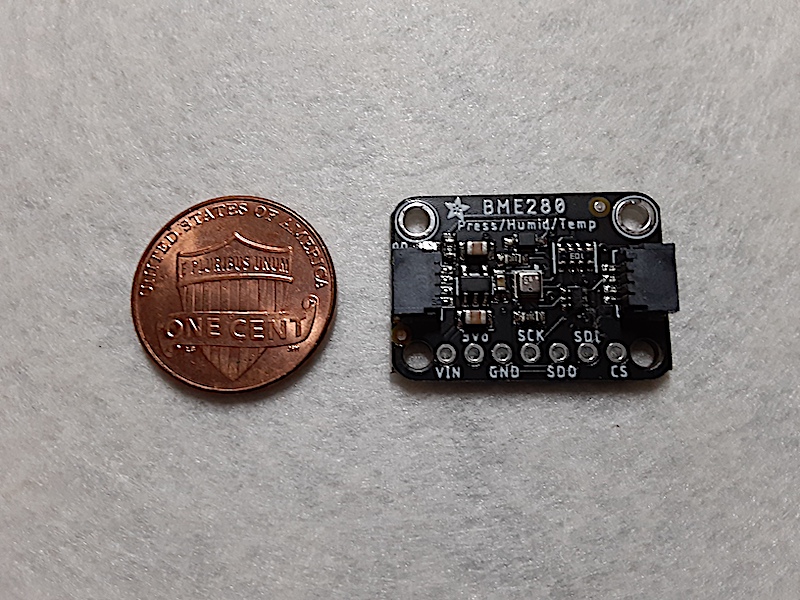
You can alternatively use [BME280](https://www.bosch-sensortec.com/products/environmental-sensors/humidity-sensors-bme280/) or [BME680](https://www.bosch-sensortec.com/products/environmental-sensors/gas-sensors-bme680/) since the [elixir-sensors/bmp280](https://github.com/elixir-sensors/bmp280) library supports them.
## Wiring
Roughly speaking, there are typically two ways to hook up a sensor to our Nerves target.
### A: Pin header
If you already have a [soldering iron](https://en.wikipedia.org/wiki/Soldering_iron) and enjoy using it, this is the go-to option. Even if you have not already, soldering can be fun. This option only requires a [pin header](https://en.wikipedia.org/wiki/Pin_header) and 4 [jumper wires](https://en.wikipedia.org/wiki/Jump_wire)
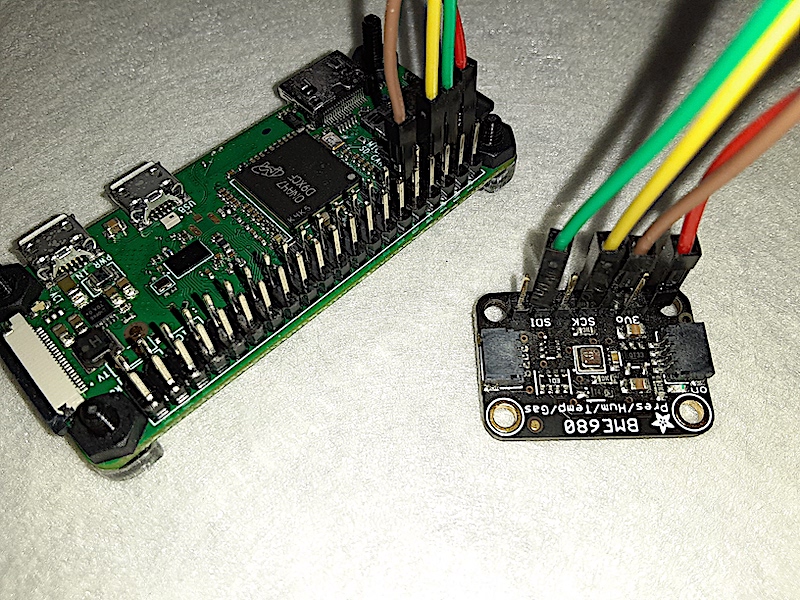
[I2C](https://en.wikipedia.org/wiki/I%C2%B2C) protocol uses 4 pins. It is confusing but different products may name the pins differently.
| Target (I2C controller) | Sensor (I2C peripheral) | Description |
| ----------------------- | ----------------------- | --------------------------------- |
| 3.3V | Vin | power |
| GND | GND | common ground for power and logic |
| I2C SDA (GPIO 2) | SDA | I2C data |
| I2C SCL (GPIO 3) | SCL | I2C clock |
[](https://pinout.xyz/pinout/)
### B: Qwiic Connect System etc
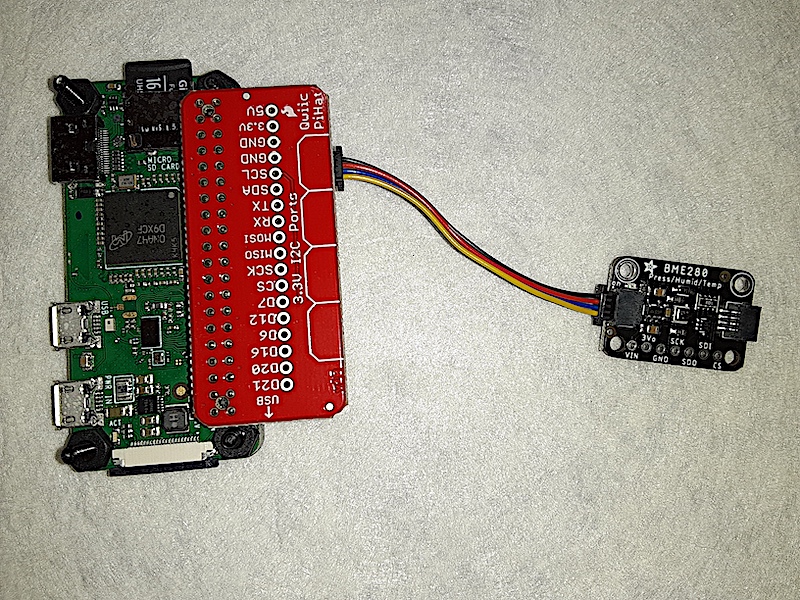
Taking advantage of [Qwiic Connect System](https://www.sparkfun.com/qwiic) or similar system, we can remove the need for the soldering. One tradeoff is that we need to get an extra board like [Qwiic HAT for Raspberry Pi](https://www.adafruit.com/product/4688) and special wires.
## Elixir libraries
All the heavy lifting is done by the following Elixir libraries:
- [elixir-sensors/bmp280](https://github.com/elixir-sensors/bmp280)
- [elixir-circuits/circuits_i2c](https://github.com/elixir-circuits/circuits_i2c)
## Detecting connected I2C devices
We want to make sure that our sensor board is wired properly. Most sensors are at address `0x77`, but some are at `0x76`.
```elixir
Circuits.I2C.detect_devices()
```
## Initializing BMP280 server
```elixir
bus_name = "i2c-1"
bus_address = 0x77
{:ok, bmp} = BMP280.start_link(bus_name: bus_name, bus_address: bus_address)
```
## Checking sensor type
```elixir
BMP280.sensor_type(bmp)
```
## Reading data from the sensor
```elixir
{:ok, measurement} = BMP280.measure(bmp)
```
## Correcting altitude
The altitude measurement is computed from the measured barometric pressure. To be accurate, it requires either the current sea level pressure or the current altitude.
For example, if your location's altitude is 100 meters, pass `100` to the `BMP280.force_altitude/1` function.
```elixir
altitude_of_your_location = 100
BMP280.force_altitude(bmp, altitude_of_your_location)
```
Subsequent altitude reports should be more accurate until the weather changes.
```elixir
{:ok, measurement} = BMP280.measure(bmp)
```
## Directly using the Circuits I2C library
So far we have interacted with the sensor using the BMP280 library's functions. Under the hood, the BMP280 library uses the Circuits I2C library that does low-level I2C read/write operations between the Nerves target board and the sensor board. We could directly use the Circuits I2C library if we wish.
First we get a reference to our I2C bus.
```elixir
{:ok, i2c_ref} = Circuits.I2C.open(bus_name)
```
As an example, let's get the sensor type information from the sensor. For the BMP280, BME280 or BME680 sensors, the sensor type information is stored at register `0xD0` and it is one byte long. We can get that byte using `Circuits.I2C.write_read/4`.
```elixir
chip_id_register = 0xD0
{:ok, <<chip_id_byte>>} = Circuits.I2C.write_read(i2c_ref, bus_address, <<chip_id_register>>, 1)
inspect(chip_id_byte, base: :hex)
```
Here is what the byte means.
```elixir
case chip_id_byte do
0x58 -> :bmp280
0x60 -> :bme280
0x61 -> :bme680
error -> error
end
```
For more details about the BMP280 sensor, you can refer to the [BMP280 data sheet](https://cdn-shop.adafruit.com/datasheets/BST-BMP280-DS001-11.pdf).